Thank you so much for the support that you have shown towards the first post of the Photography Series. Your emails and comments on Understand and Play with Light are much appreciated. I hope I have answered all your queries. Today, we will talk about three important elements - Understanding ISO, Aperture and Shutter Speed. It plays a vital role in making a picture It’s a long post with lots of information and details to talk about. If you are new to this, it might take some time to understand and grasp it. When I started photo-shooting in Manual mode, I read these details again and again for months to figure it out and I am still reading, still learning.
The three key elements that work as a chemical process to create an image are ISO, Aperture and Shutter Speed
I will start by explaining each one of them. Then we will see how they are connected to each other and how we can create a balance.
ISO
It stands for International Organization of Standardization. Inside your digital camera, there is a component called ‘image sensor’ which collects the available light and creates an image. ISO measures the sensitivity of the ‘image sensor’ and accordingly reacts to the available light. ISO ranges from 100 – 6400 and can go even beyond depending on how advanced your camera is.
In the below set of photos, I kept changing the ISO but the rest of settings were not changed. This would give you an understanding of how the image sensor reacted to the light.

In the example below, I changed the shutter speed to get a similar end result even though it was shot with a different ISO. When we discuss shutter speed later, we will see how it works. Right now, concentrate on how the picture that was shot with ISO 3200 looks grainy and has noise in the background unlike the one photographed with ISO 400 which is smoother and detailed.
The lower the ISO, the lesser the sensitivity. The higher the ISO, the more the sensitivity and hence, more noise or grain.

In a bright daylight I usually stick to ISO 100 or 200. When I click at night or in a very dark place, I have to increase the ISO to maximum, if required. While there are some who don’t like noise, there are some who would add noise while post processing. It’s an individual’s choice.
Aperture
Every lens has an opening through which light travels to the image sensor. The size of the opening is referred to as Aperture and it determines the amount of light that enters your camera image sensor.
It works exactly like our eyes! Lets go back to the science chapter where we learnt that for our eyes to see clearly light needs to reach the retina through the pupil, which is the tiny black spot in the center of the iris. In this case, retina would be your ‘image sensor’ and the pupil would be the ‘lens-diaphragm-opening’
Whenever there is a bright light, we tend to shrink our eyes so that we don’t get blinded by it. Whenever there is less light, we tend to expand our eyes so that we can see better. In similar manner, we need to adjust the aperture on the lens opening to make sure we have just the right amount of light entering.
Aperture is measured in f/stops or f/number e.g. f/1.4, f/1.8, f/2 etc. There is a lot of math and calculation involved in why and how these numbers got created. Honestly speaking, it’s too much math for my tiny brain; hence I just follow this thumb rule.
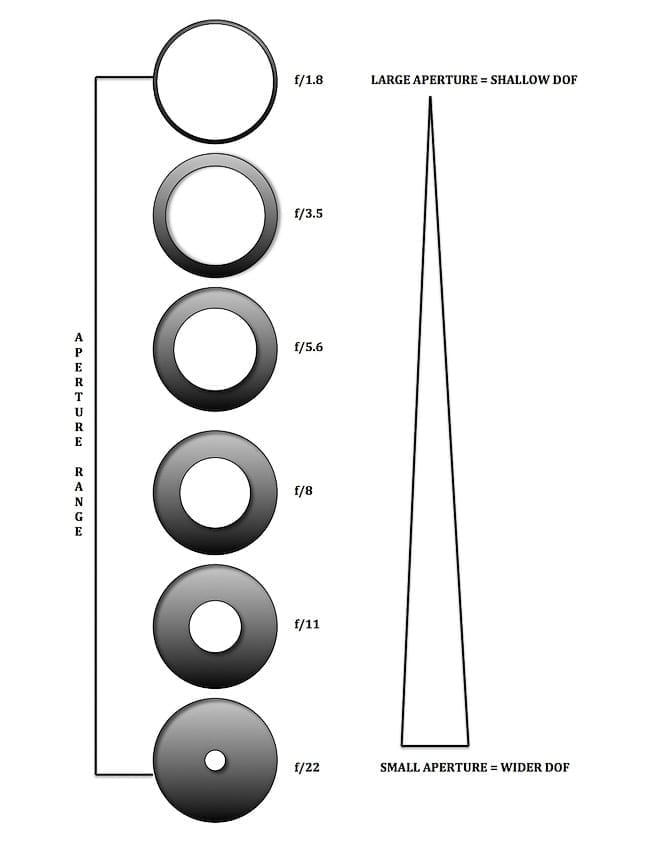
The bigger the lens diameter opening, the smaller the f/stop should be. So, if your f/stop is at 1.4 you will have maximum light entering the camera image sensor. While at f/22 you will have least amount of light entering the camera image sensor.
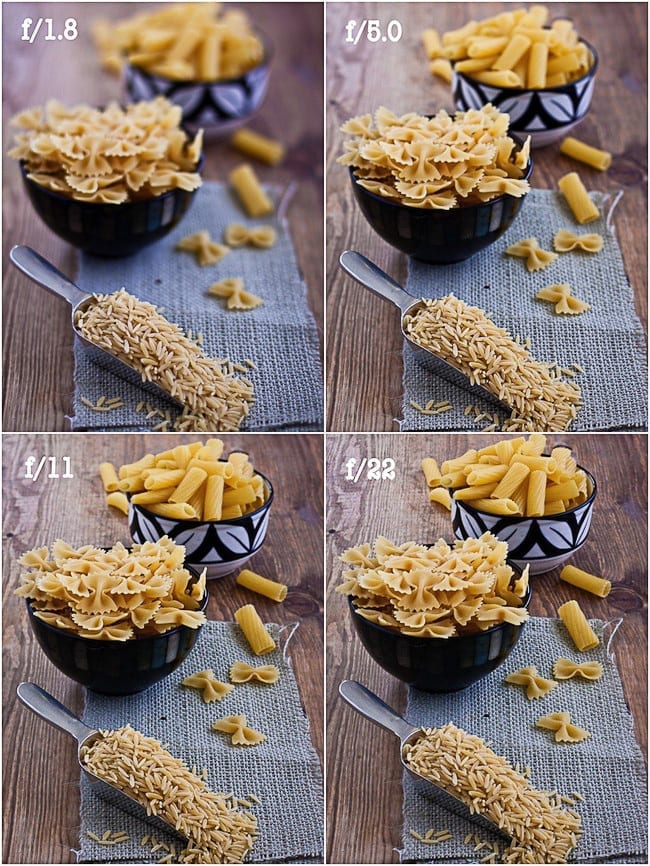
Aperture also helps creating a depth a field in your photo. Depth of field (DOF) means how much of area in your photo is in focus. It depends on the focusing distance.
Larger or Wider DOF would mean that most of the area in an image is in focus and for doing that you have to click in higher f/stop number. Shallow or Narrow DOF means only certain part of the image is in focus creating a blurry or fuzzy background, which can be created by clicking in lower f/ stop number.
In the below example, notice the gradual transition as I increased the f /stop.
Shutter Speed
It is the amount of time the shutter stays open for the light to fall on the image sensor to create an image. Remember, inside your camera, it’s dark. It needs light to capture an image and light doesn’t automatically enter inside the camera. Once you set the f/stop and ISO, you have decided the amount of light and the sensitivity of the light. You have to now allow the light to travel to the image sensor by pressing the shutter button.
Shutter speed is measured in seconds or fraction of a second like 1/50, 1/60, 1/80 etc.
The higher the denominator number, the lesser time it gets for light to enter and hence creating a faster shutter speed. The lower the denominator, the more time the shutter stays open and more light enters in, thereby slowing the shutter speed.
Shutter speed is connected with the focal length of the lens. In daylight shooting, a 50mm lens would probably require a shutter speed of 1/60 and with a 200mm lens you would have to shoot at a 1/250-shutter speed. This is not a rule and it will differ depending on the ISO and f/stop. We will discuss how to balance these a little later.
When I am photographing still life, portrait, landscape I generally stay within a particular range of 1/ 60 sec to about 1/200 (approximately) and that is normal for any existing light situation.
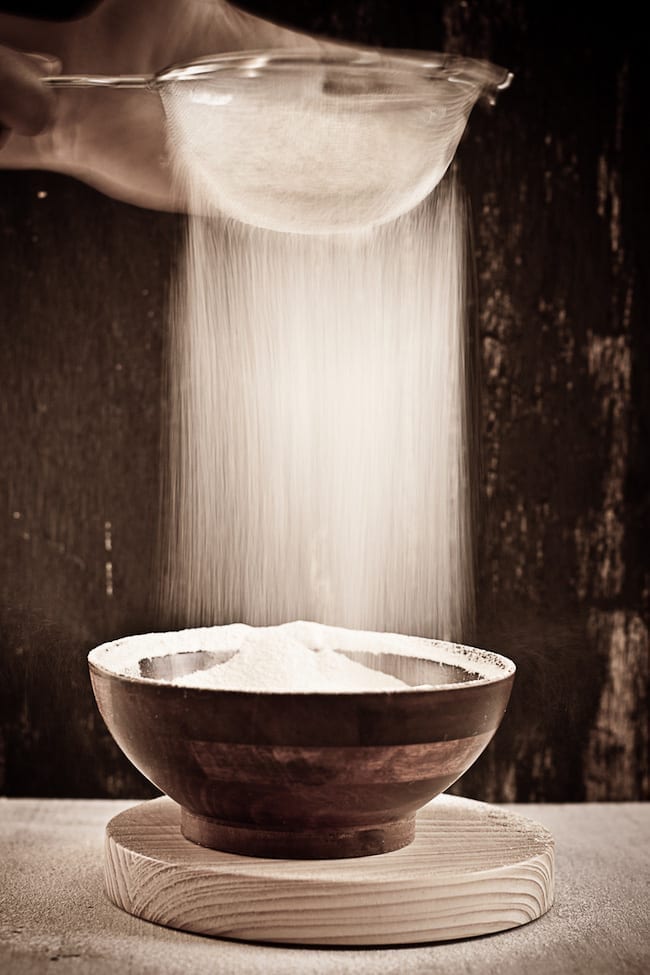
When there is low light, or when I want to photograph a motion, I slower the shutter speed allowing it enough time to capture the available light. During such situation a tripod is must or else the camera will shake creating a blurry image. Slower the shutter speed means lowering the denominator.
In the below example I used a lower shutter speed so that I could capture the movement.
Camera Setting { f/3.2, ISO: 100, ⅛ sec shutter speed}
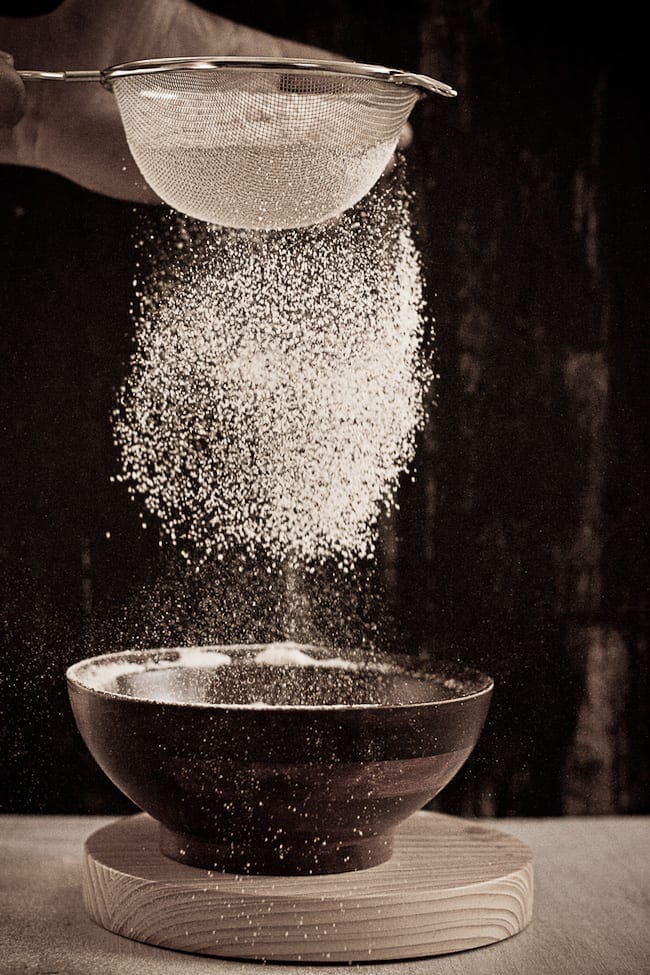
On the other hand, if you wish to freeze a motion, like photographing playing kids, or surfers on the ocean, you would need to use a faster shutter speed.
In the below example I tried capturing the flour falling on the bowl, trying to freeze the action unlike in the previous photo where I captured the motion
Camera Setting { f/2.8, ISO: 3200 at 1/1000 sec shutter speed}
Balancing the three elements: In case you dozed off in between, let’s do a quick recap!
- Image sensor is the object inside your camera that creates a picture and the sensitivity of the light that falls on the image sensor is determined by ISO.
- The lens opening that allows the light to fall on the image sensor is called aperture and is measured in f/stop.
- And finally, shutter speed determines how long the image sensor should be exposed to light before it ‘clicks’ the image.
Finding the balance is important to get the exposure you are looking for. Let us look at it through some examples.
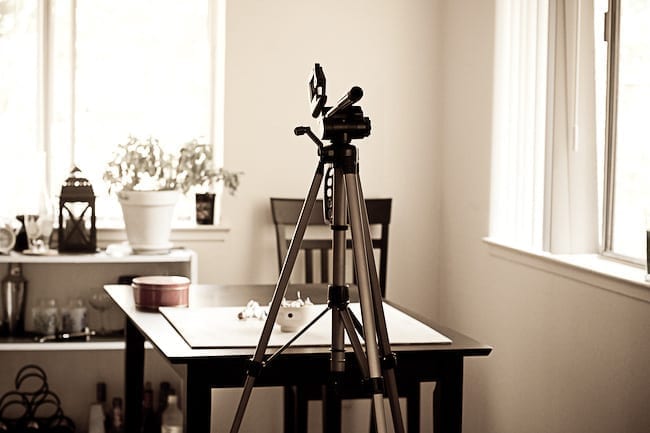
This is the set up I used and that’s where I take all my photos. It’s a tiny area next to my kitchen but I love the space because of the two well-lit windows. This way, I get both side light and back light.
Example 1: Grapes
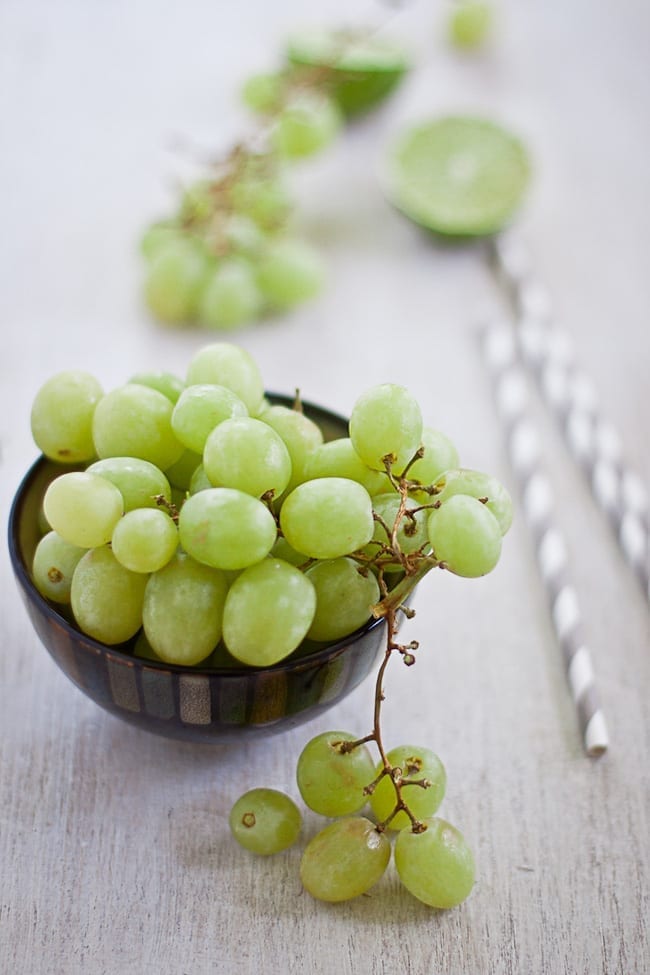
It was a sunny day. I pinned a thin white cloth on both the window blinds thereby diffusing the light. I started with ISO 200. My plan was to focus on the grapes and have a blurry background. So, I set the f/stop at f/1.8 and then, I started to look at the viewfinder of the camera to see how the exposure and light looks. The shutter speed was at 1/50sec, which made it too bright and so. I increased the shutter speed to 1/60sec and it gave me the lighting, the exposure and the depth that I wanted.
Camera Setting {f/1.8, ISO: 200 at 1/60 sec shutter speed}
Example 2: Corn
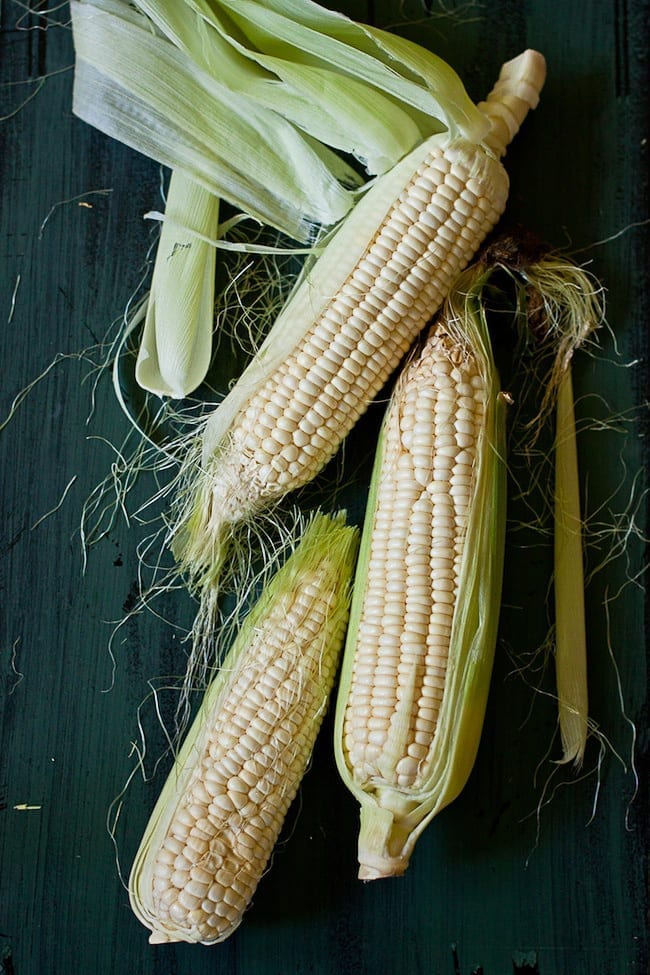
I wanted an over the top shot and so I removed the table and kept the board on the floor next to the window. I started with f/2.8 because I wanted most of the corn to be visible. As I changed the lens diameter from 1.8 (in previous shot) to 2.8, it automatically reduced the amount of light that could enter the image sensor. It looked little dark and so, I increased the ISO to 400. After looking through the viewfinder of the camera, it still looked underexposed and hence I lowered the shutter speed to 1/50 sec and I was happy.
I didn't use any reflector and that created a nice shadow on the right side of the frame.
camera setting {f/2.8, ISO: 400 at 1/50 sec shutter speed}
Example 3: Splashing Water
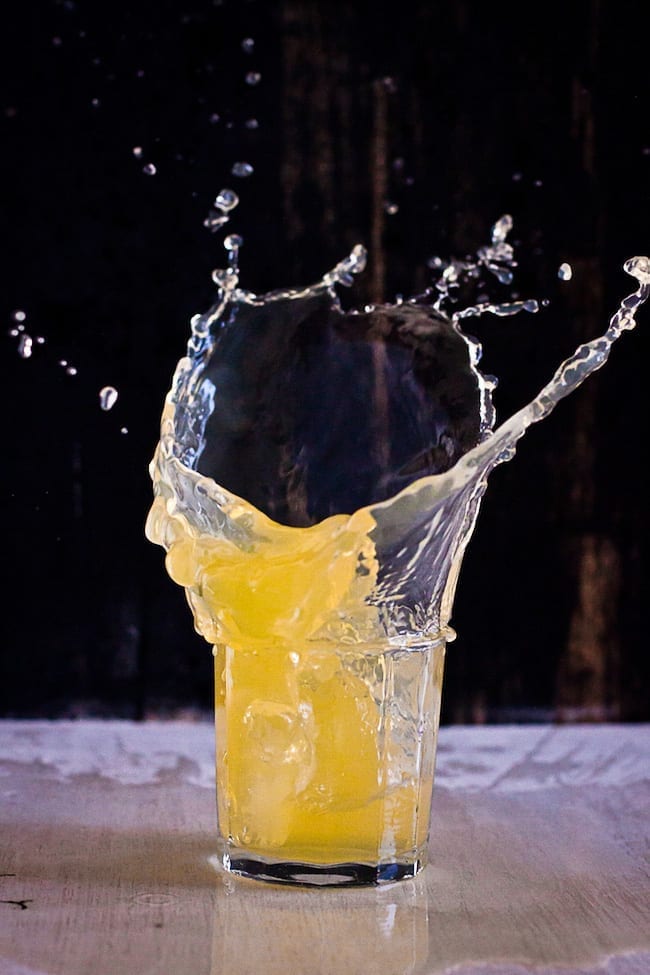
This was a tough and messy shot! I wanted to freeze the motion and like I said before, in order to do that we would need to click at a much faster shutter speed. I used only sidelight in this case. Since I knew I was going to use a fast shutter speed, I had to increase the ISO so that enough light goes in at the quickest amount of time. Finally, I photographed it at ISO 3200, f/ 3.2 at 1/1000 sec. I am still experimenting with these kinds of shots, trying out different setting but for now, I am satisfied with this.
Camera Setting {f/3.2 , ISO: 3200 at 1/1000sec shutter speed}
Here is a very interesting diagram on Exposure Triangle that I found in Flickr. It is very useful to understand the balance.
It will not be easy to remember all these terms if you are reading it for the first time. You will have to read it again and again. Eead more articles on the internet, see youtube videos and then slowly you'll get used to the concept. You have to practice and practice a lot! Hope this was useful and if you have any questions, you know how to contact me!
Next up: We will talk about white balance, metering and more on camera settings.


Maja
Kankana, such an amazing and inspiring post! Few months ago I bought dslr camera, so this post is everything what I need! Thanks dear!
Brook
Thank you so much for this post. The pictures are gorgeous and you have managed to convey some very intimidating information (to a photo newby) concisely. This will obviously take quite bit of practice and patience!
Brook
Ira Rodrigues
I like the way you describe, understandable and easy to digest! you are phenomenal Kan and I speechless. Thank you for being so kind and i always enjoy to read your series of photography tutorial.
prachi
loved,loved this post. I have read quiet a lot of posts on f stops and shutter speeds, but this is the first time I really understood. You have explained beautifully and the photographs are totally awesome!!!
thanks kankana and keep the posts coming!!
cheers
prachi
dassana
Fab post & fab pics Kankana. Even when i started with manual mode, i read at least thrice to understand all these elements.
Regarding the meaning of ISO - International Organization of Standardization... When i first read in a book, i laughed. Being a quality analyst in quality we have something like ISO and have to adhere to its principles and objectives. ISO precisely means that - International Organization of Standardization. I wonder why they did not change the definition in photography to something else.
Sihi
Beautiful, stunning and absolutely brilliant! You rock, girl!
Best,
Sihi
torviewtoronto
lovely post Kankana beautiful pictures, really enjoyed
I am following your tweets 🙂 keep in touch now that there is no foodbuzz
Anamika
Kankana,a BIG THANK YOU for this post and the series, it is extremely helpful and very well explained too. Amazing photographs, I need to read this post more than once and start implementing, hope to learn more from your series.
lizzie strayedtable
This is great. I am on the learning curve myself with photography. So much to learn, but I think practice still makes perfect.
Vishakha
At the risk of sounding cliché, I'd like to applaud you for the knowledge you are sharing on this platform. I am sure the knowledge you got from one post, took a lot of time and practice for you to build. To share, is a virtue!:)
I am not & don't consider myself an artist of any sort and probably that is why, I struggle a bit with composing shots - esp food photography. If you can talk about it in one of your posts, it would be very helpful. Thanks 🙂
Kankana Saxena
Thanks Vishakha 🙂 I have that too in my list but it will come a little later in the series! For now I can say that visiting food photographer's blog and portfolio helped me to get inspired and learn in the process. Read Plate to Pixel by Helene. That helped me a lot too.
Tes
Amazing Amazing! All I can say here is amazing!!! Thanks for such a helpful and informative post 🙂
Reshmi
Loved your post. Truly informative!
Tanvi
Fantastic post! You really simplify some difficult concepts. Thank you for making this series!
mjskit
What a great tutorial! Thank you for taking the time to simplify and illustrate! Love your examples and ALL of your photography!
Debjani
Kankana, thank you for taking the time to prepare this for us. It is very well done. Do you see yourself teaching photography in he future, someday? I do. I hope you do.
Kankana Saxena
Debjani.. jani nah ki bolbo 🙂 If I ever reach at that level, it would be a dream coming true 🙂
Deepa
You have explained the exact details that I was looking for though I have a basic camera now but this is going to help me in future...Breathtaking pictures....The flour jar clicks are looking straight out of some food magazine...
rebecca
wow your a pro will bookmark and one day in future as kids grow will look into it -) hugs
Nami | Just One Cookbook
I cannot thank you enough for your tutorial series. I love how you write in simple words so my small brain can take it. I read some books but I really love that you summarize important part so clearly!! I cannot wait for next series. And hopefully you will continue this series with many food photography topics after your photography tutorials (basically please don't stop teaching us!! haha). 🙂
Kankana Saxena
Nami, you are such a sweet heart 🙂 I too hope that the learning and sharing doesn't stop ever! I received your query and would respond back by tomorrow for sure.
Reem | Simply Reem
Marvelous!!!
U have really made it easy to understands the different elements of photography... Kan u have really come a long way, I am following ur foot step...
always...
I am loving the water splash picture...
Beautiful....
Kitchen Belleicious
wow! Breathtaking photos and I learned so much from just reading this. I need to get some better equipment i think. Speaking of, I am going to be getting a new camera here shortly. I have a nikon already- what do you suggest